Sheeted tiles -
installation guidelines
The information contained on this page is designed to ensure the best installation of our sheeted tile product.
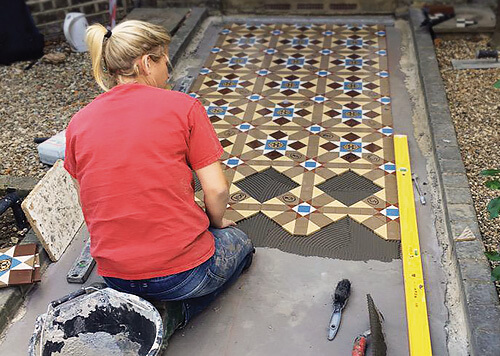
For the purposes of illustration we have used a case study, a typically sized path and a common design, as an example to provide a step by step guide. Whilst London Mosaic strive to provide as much guidance, support and assistance as possible, we cannot be held responsible for poor installations
Please ensure to adhere to the principals and advice in order to achieve the best possible installation and finish. Should you have any questions regarding this system please contact us directly.
Please read all instructions
before proceeding
Eleven steps to fitting
our sheeted tiles

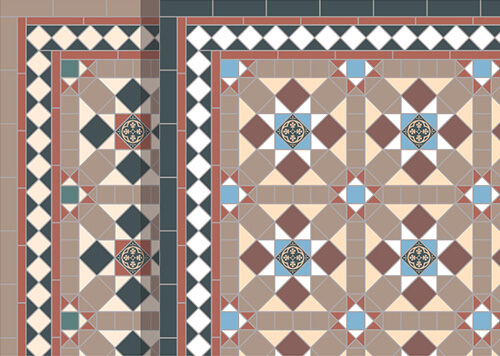
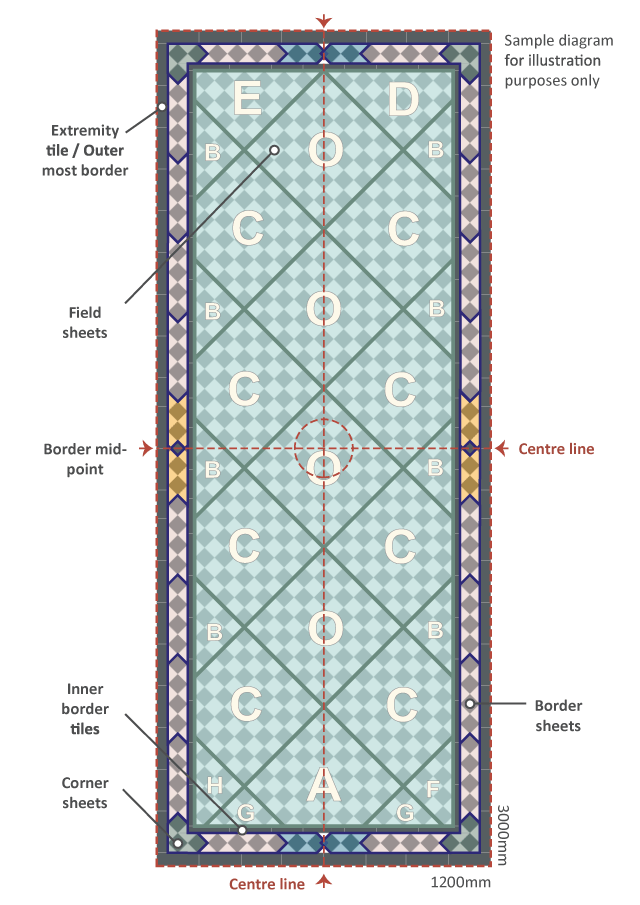
1 Establishing the centre point and symmetry lines
Understanding the position of a design before permanently fixing the tiles is very important. The centre point and lines can be adjusted following step 2 if required.

2 Dry-laying the field sheets
Without adhesive, position the key component field sheets on the centre lines. Check the field area is correct along with the resulting width allowance for the border before proceeding.

3 Dry-laying the border sheets
Ensure sufficient width on all sides of the field design for the border. Set in place a few of the following border components without adhesive:- 1. Inner border 2. Sheeted border 3. Extremity tile (commonly 50-75 mm)
Do not install the border first. Do not attempt to remove the clear plastic surface sheet until the adhesive has set and dried.
4 Installing the field sheets
Following the diagram, ensure you have each sheet orientation correct before installing.

5 Installing the loose inner border tiles
These are commonly a rectangular tile, 150 x 25 mm and are always supplied loose.
Starting in each corner, set the tiles according to the illustration and work towards the midpoint of a border run.

6 Installing the loose inner border tiles continued
When approaching the mid-point of a border maintain balanced tile sizes.
Avoid creating small shapes for final in-fills as illustrated.

7 Install the border sheets
Start with the specific border corner sheets and work from each corner to the mid-points of the border runs. Continue with the sheeted border sections as illustrated towards the marked centre line or mid-point.

8 Configuring symmetrical mid-points
Due to the nature of this type of geometric tile, often the sheeted sections either overlap or will not meet exactly at the mid-point.
The overlapping sheeted tiles will need to be cut and adjusted to create a visually appealing feature, commonly seen in period flooring.
In this illustrated example, we see how custom cuts are best used to complete the border run at the mid–point.

9 Installing the extremity border tile
Also referred to as the 'outermost border tile', these are cut from a larger tile. These are typically supplied as 150 x 150mm.
Alternative sizes are sometimes used, such as 100 x 100mm and 200 x 200mm.

10 Installing the extremity border tile continued
These tiles are never supplied pre-cut, should be installed last and allow tolerance when installing.
To reduce wastage, aim to cut more than one shape from a single tile. We provide spare tiles with each order for this purpose.
When installing these tiles, maintain balanced sizes and shapes.
As a general rule, when in-filling wider sections or setting multiple lined borders, do so by staggering the grout lines in a brick set style.

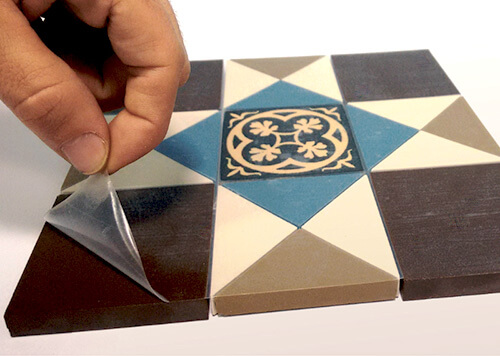
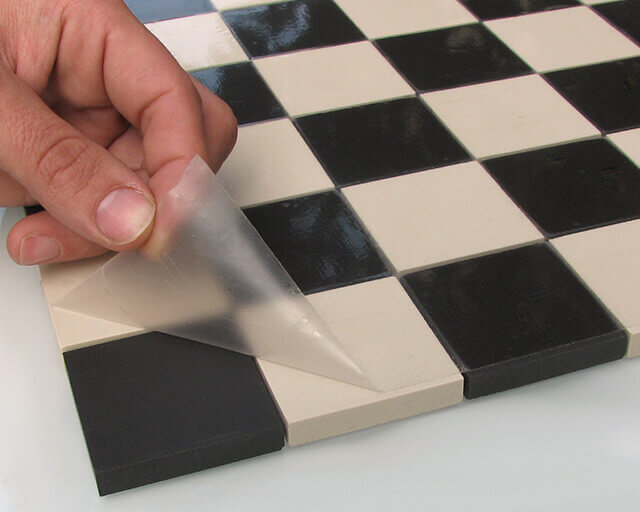
11 Removing the film
The surface film that holds the tiles in place can be carefully removed once the tile adhesive has set and cured fully.
When removing the film, peel slowly and firmly in a horizontal direction. Do not attempt to pull the tape vertically. The area is then ready for grouting and cleaning.
Hints tips & recommendations
Guidelines in brief
- Base should be smooth and solid.
- Check positioning of tiles before fixing.
- Fixing order: field, border, extremity.
- Always use a high quality grey adhesive.
- Refer to the enclosed diagram at all times.
Fixing the tiles
- Always lay a section of sheets without adhesive to check the positioning of the design.
- Adjustments are often required for awkward shaped areas, we refer to this process as dry-laying.
- Always use a high quality grey tile adhesive and grout.
- We recommend rapid-set types.
- Ensure that the final consistency of the tile adhesive used is not too wet, this allows better control during installation.
Plastic film
- Leave the plastic film in place until all the tiles have been fixed.
- It provides protection against contaminants entering the grout lines during installation.
- Removing the plastic film before the adhesive has cured will likely result in tiles becoming unstuck.
- Small amounts of adhesive residue may remain but this is easily removed during the final cleaning process.
Cleaning
- During and after grouting, remove as much cement residue from the surface of the tiles before the area fully dries.
- Any stubborn cement based residues can be removed with a dilute acid based solution, formulated specifically for tiles. Use with caution.
Checklist
- Ensure the base is cured, clean and free of contaminants.
- A smooth flat surface without undulations makes for a trouble free installation.
- Correct uneven surfaces with an appropriate filler adhesive or self-levelling compound.
- Each sheeted design is accompanied by a full diagram showing the entire layout and positioning, according to the provided measurements. Please double check the measurements onsite prior to installation.
- If anything is missing or damaged, or for any queries, please contact us before proceeding.